Writing Custom GLSL Materials
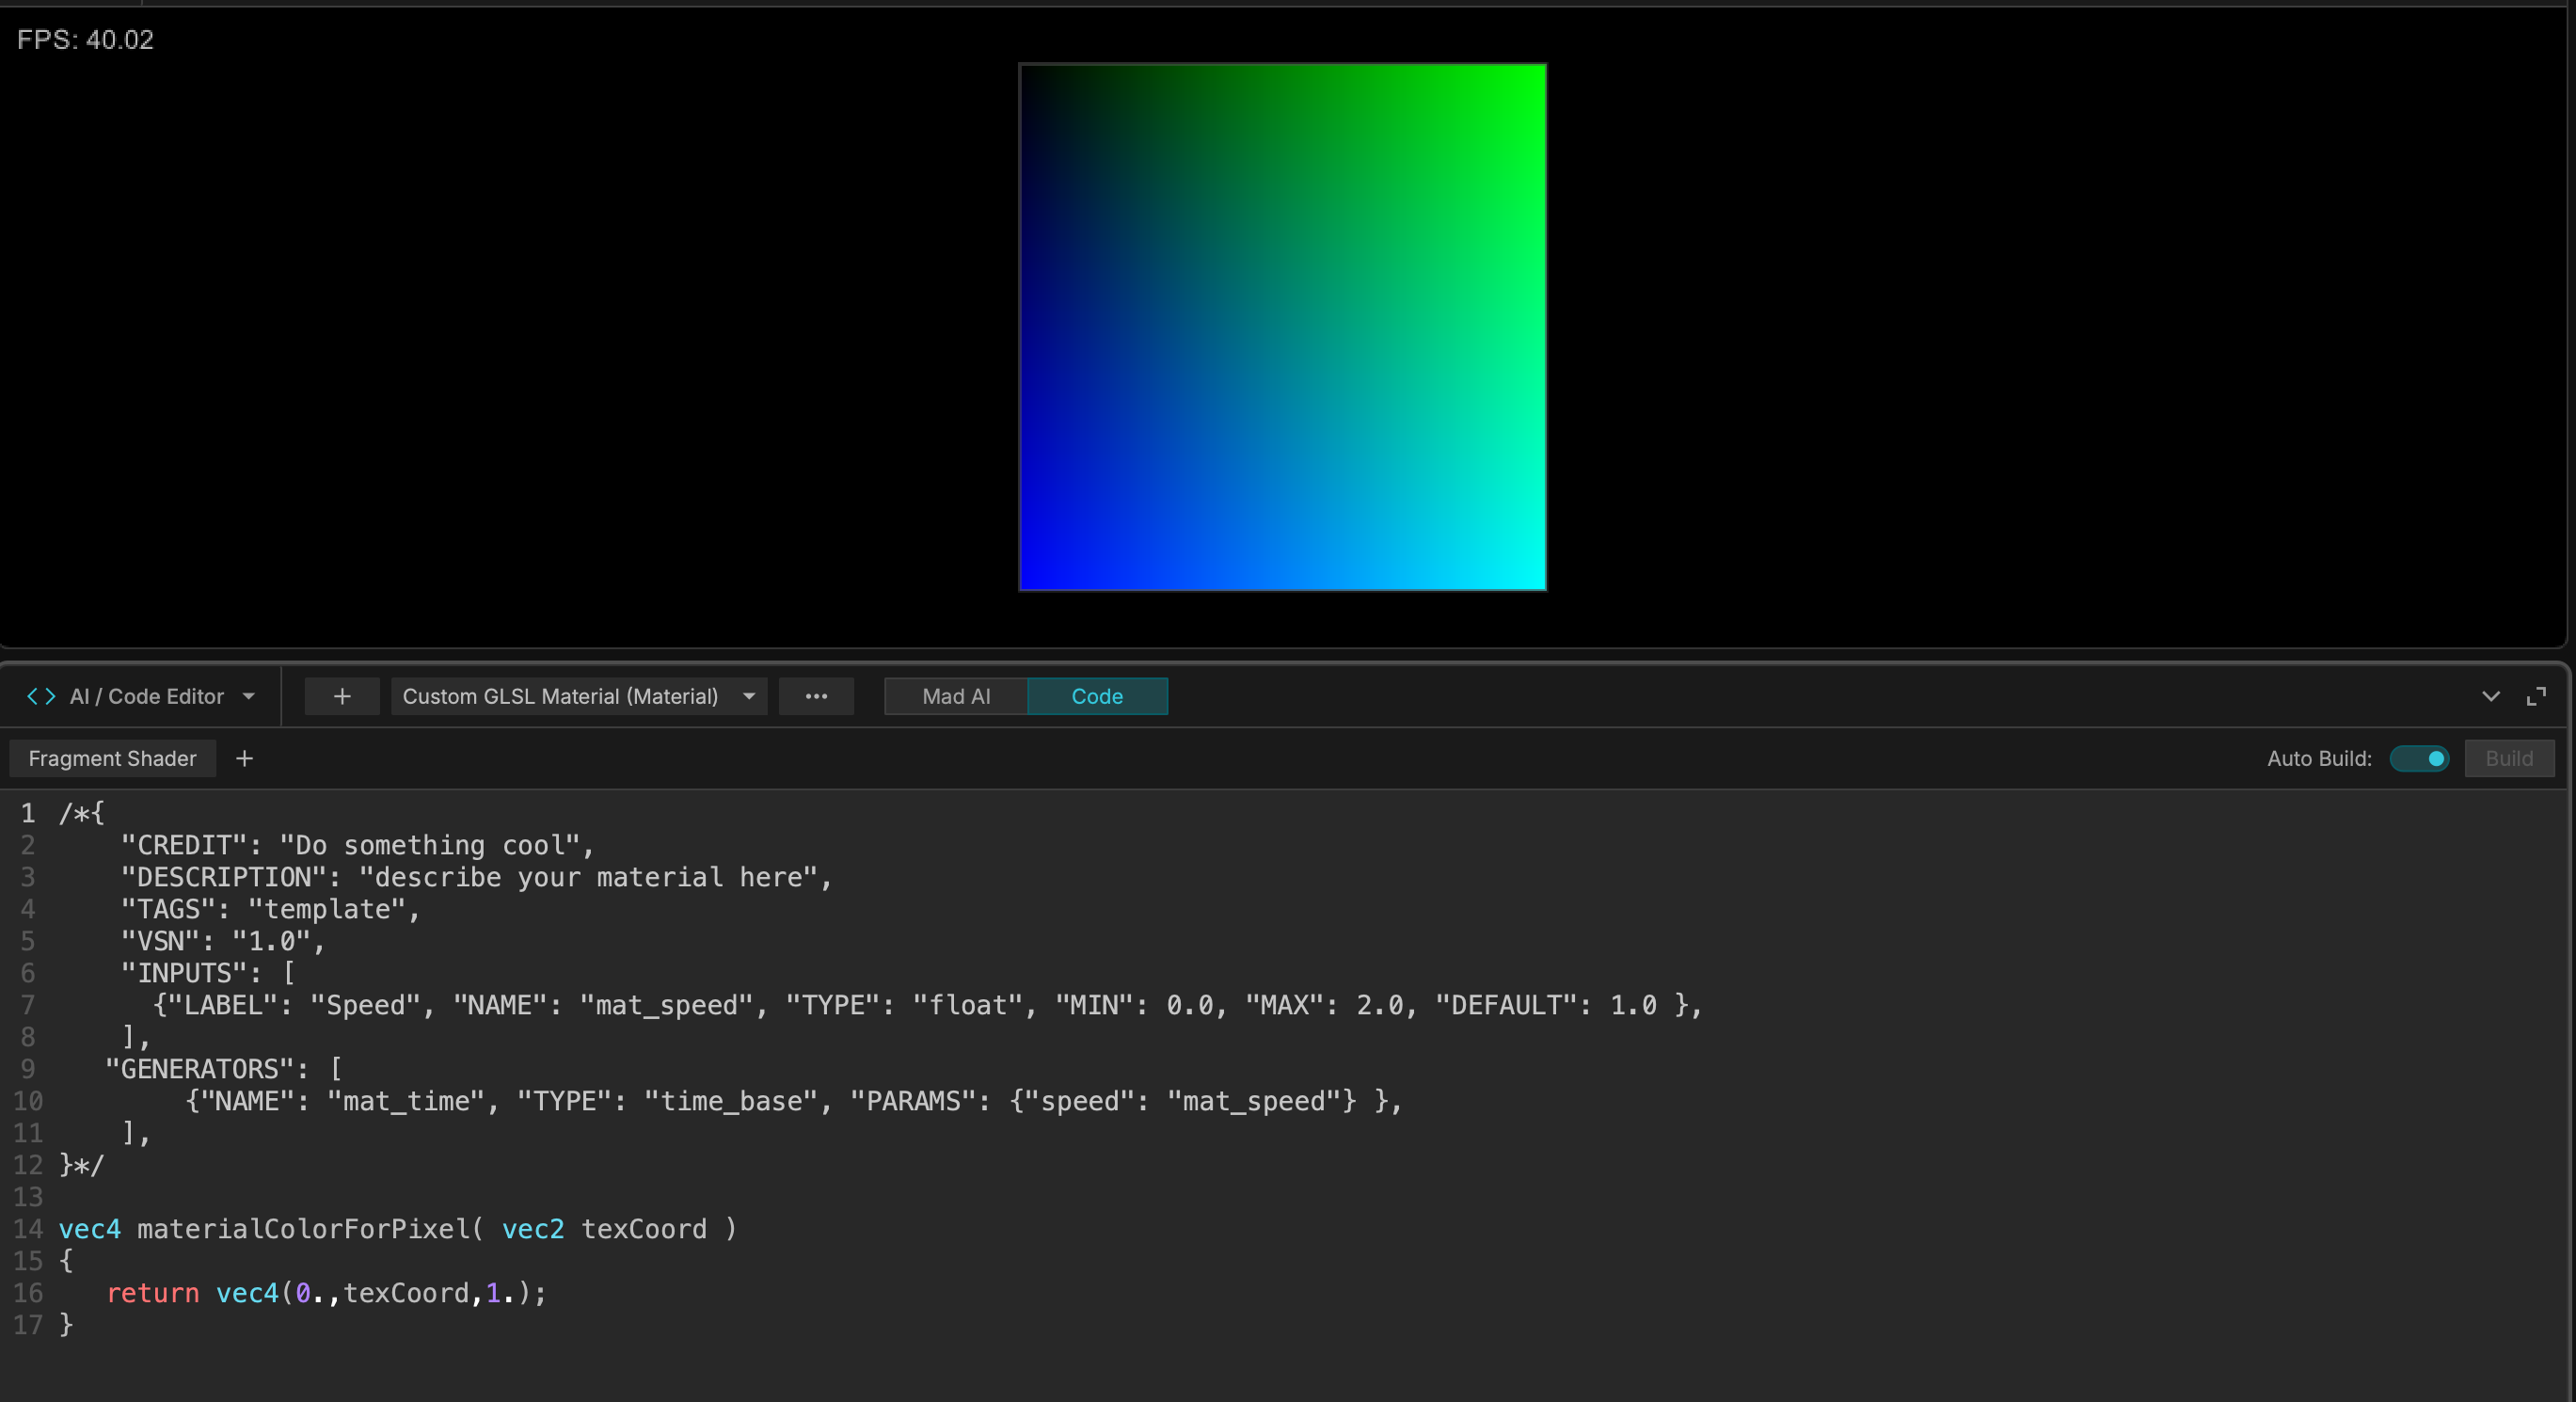
MadMapper Materials are generative, animated visuals rendered directly on the screen by your computer's GPU. While you can use the Mad AI extension to generate materials using text prompts, you also have the ability to write or modify the raw GLSL (OpenGL Shading Language) code yourself.
MadMapper Materials are based on the standard ISF (Interactive Shader Format) specification. However, because they are rendered directly onto MadMapper's output surfaces (Quads, 3D Surfaces, Lines, Fixtures) rather than just a flat texture, MadMapper utilizes a specific boilerplate and offers several powerful custom extensions.
Accessing the Code Editor
Writing code in the editor is very similar to using Mad AI to create a new shader.
-
Navigate to the Media Bin and open the Materials section.
-
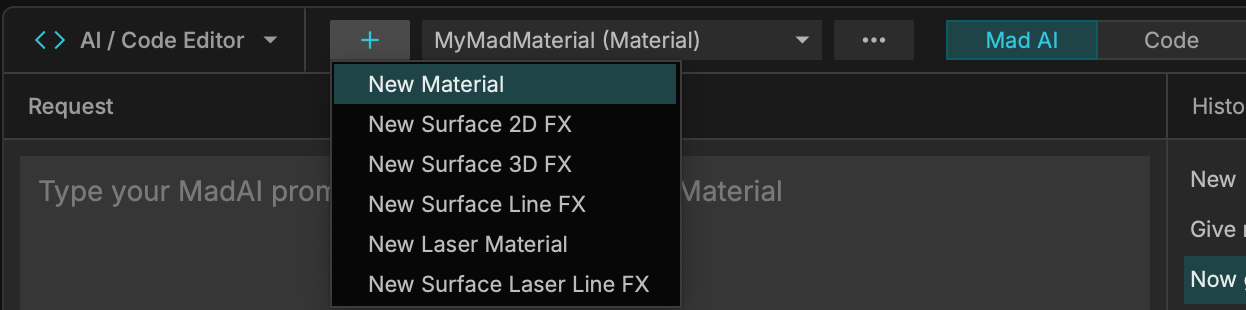
Click the + (Plus) button to create a new material.
-
You can either start with a blank material, or if you are using Mad AI, you can toggle directly from the AI interface over to the raw Code Editor to manually tweak the math the AI generated.
The Basic Boilerplate
Unlike a standard GLSL shader that uses a "void main" function, MadMapper fragment shaders require you to implement a specific function called "materialColorForPixel". This function must return a vec4 color based on a 2D texture coordinate.
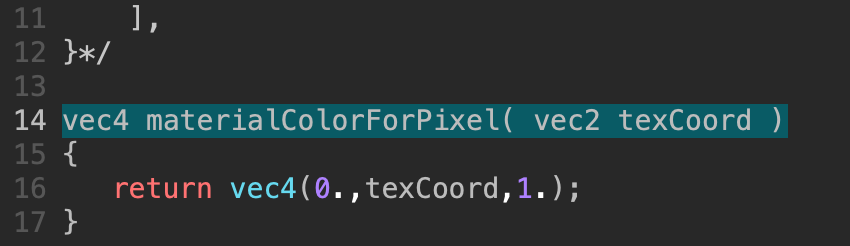
Here is the most basic boilerplate for a MadMapper material:
OpenGL Shading Language
/*{
    "CREDIT": "Your Name",
    "TAGS": "Generative, Custom",
    "INPUTS": []
}*/

// texCoord is the texture coordinate (position in the input media for this pixel)
vec4 materialColorForPixel(vec2 texCoord) {
    // Returns a solid red color (Red, Green, Blue, Alpha)
    return vec4(1.0, 0.0, 0.0, 1.0);
}
Exposing UI Parameters (Inputs)
To control your shader live, you can declare INPUTS inside the JSON header block at the top of your file. MadMapper will automatically read this JSON and build the corresponding sliders, buttons, and color pickers in the Inspector.
-
Naming Convention: Always start your variable names with "mat_" (e.g., mat_speed or mat_color). This prevents your variables from conflicting with MadMapper's internal Surface FX code.
-
Supported Types: You can create parameters of type float, int, bool (checkbox), color, and floatRange (a min/max slider).
-
UI Flags: You can alter how the UI looks using the FLAGS parameter. For example, assigning "FLAGS": "button" to a boolean turns the checkbox into a push-button. Assigning "FLAGS": "no_alpha" to a color input removes the transparency slider.
-
Grouping: You can organize your parameters into clean folders in the Inspector by adding a forward slash to the LABEL. For example, "LABEL": "Noise/Speed" will put the Speed slider inside a "Noise" group.
Example of an Input Variable:
JSON
{
    "LABEL": "Global/My Speed",
    "NAME": "mat_speed",
    "TYPE": "float",
    "MIN": 0.0,
    "MAX": 1.0,
    "DEFAULT": 0.5
}
Built-In Variables & Macros
MadMapper automatically provides several global variables to your shader, following the ISF specification:
-
TIME: The elapsed time in seconds.
-
TIMEDELTA: The time passed since the last frame.
-
RENDERSIZE: The dimensions of the output (Note: this is only valid if you enable "Render to Texture" in the material settings, as standard materials do not have a fixed pixel resolution).
Example: Using TIME for animation and RENDERSIZE for pixel-perfect math.
OpenGL Shading Language
/*{
    "CREDIT": "MadMapper User",
    "TAGS": "Variables",
    "INPUTS": []
}*/

vec4 materialColorForPixel(vec2 texCoord) {
    // 1. TIME: Create a pulsing value between 0.0 and 1.0
    float pulse = (sin(TIME * 3.0) + 1.0) * 0.5;

    // 2. RENDERSIZE: Get the exact pixel coordinate
    // (Note: "Render to Texture" MUST be enabled for this to work!)
    vec2 pixelCoord = texCoord * RENDERSIZE;

    // Draw a color that shifts based on the pulse
    vec3 color = vec3(texCoord.x, texCoord.y, pulse);

    return vec4(color, 1.0);
}
Audio Reactivity
You can easily pass audio data directly into your shader code using the audioFFT (spectrum) or audio (waveform) input types. MadMapper allows you to define the SIZE of the frequency bands and apply internal ATTACK, DECAY, and RELEASE smoothing filters directly in the JSON header.
Example: Creating a 16-band spectrum analyzer with built-in attack/decay smoothing.
OpenGL Shading Language
/*{
    "CREDIT": "MadMapper User",
    "TAGS": "Audio Reactive",
    "INPUTS": [
        {
            "NAME": "mat_spectrum",
            "TYPE": "audioFFT",
            "SIZE": 16,
            "ATTACK": 0.05,
            "DECAY": 0.2,
            "RELEASE": 0.1
        }
    ]
}*/

vec4 materialColorForPixel(vec2 texCoord) {
    // Audio textures are 1D (height is always 1 pixel).
    // We sample the spectrum using the built-in IMG_NORM_PIXEL macro.
    // We use texCoord.x to sweep across the frequency bands.
    float audioValue = IMG_NORM_PIXEL(mat_spectrum, vec2(texCoord.x, 0.5)).r;

    // If our Y coordinate is below the audio volume, draw green. Otherwise, draw black.
    vec3 color = texCoord.y < audioValue ? vec3(0.0, 1.0, 0.5) : vec3(0.0, 0.0, 0.0);

    return vec4(color, 1.0);
}
Generators (Solving the "TIME" Problem)
If you animate a shape by multiplying TIME by a user-controlled mat_speed slider, changing the speed live will cause the animation to jump wildly (because the total multiplier suddenly shifts).
To solve this, MadMapper introduced Generators. Instead of doing the math in GLSL, you declare a time_base generator in your JSON header. MadMapper will calculate a smooth, continuously increasing value based on your speed, and pass that perfect value into your shader as a variable.
Generators can also be synced perfectly to the application's global tempo by setting "bpm_sync": true.
Example: Using a time_base generator synced to the global BPM to drive a smooth animation, rather than directly multiplying TIME.
OpenGL Shading Language
/*{
    "CREDIT": "MadMapper User",
    "TAGS": "Generators",
    "INPUTS": [
        {
            "LABEL": "Animation Speed",
            "NAME": "mat_speed",
            "TYPE": "float",
            "MIN": 0.0,
            "MAX": 2.0,
            "DEFAULT": 1.0
        }
    ],
    "GENERATORS": [
        {
            "NAME": "mat_anim_time",
            "TYPE": "time_base",
            "PARAMS": {
                "speed": "mat_speed",
                "bpm_sync": true
            }
        }
    ]
}*/

vec4 materialColorForPixel(vec2 texCoord) {
    // Instead of doing: sin(TIME * mat_speed)
    // We use the perfectly generated 'mat_anim_time' variable!
    float smoothAnimation = (sin(mat_anim_time) + 1.0) * 0.5;

    return vec4(vec3(smoothAnimation), 1.0);
}
Included Libraries
MadMapper bundles highly optimized open-source math libraries directly into the software. You do not need to write complex noise algorithms from scratch; simply include them at the top of your shader code (after the JSON header) using standard include statements.
-
MadCommon: Provides constants like PI, and essential color conversion functions like rgb2hsv and hsv2rgb.
-
MadNoise: Provides incredibly powerful 2D and 3D noises, including vnoise, simplex noise, worleyNoise, flowNoise, fBm (Fractal Brownian Motion), and curlNoise.
-
MadSDF: Provides a library of Signed Distance Field math, making it exceptionally easy to draw crisp 2D shapes mathematically.
Example: Using MadNoise for generative textures and MadCommon to convert Hue, Saturation, and Value into an RGB color.
OpenGL Shading Language
/*{
    "CREDIT": "MadMapper User",
    "TAGS": "Libraries",
    "INPUTS": []
}*/

// Include statements must go AFTER the JSON header and BEFORE your functions
#include "MadCommon.glsl"
#include "MadNoise.glsl"
#include "MadSDF.glsl"

vec4 materialColorForPixel(vec2 texCoord) {
    // 1. Use MadNoise to create a 3D simplex noise
    // We pass it our X/Y coordinates and TIME for the Z axis so it evolves
    float n = noise(vec3(texCoord * 5.0, TIME * 0.5));

    // 2. Use MadCommon's hsv2rgb function
    // We slowly shift the Hue based on TIME, while keeping saturation and value at 1.0
    vec3 rainbowColor = hsv2rgb(vec3(TIME * 0.1, 1.0, 1.0));

    // Multiply our rainbow by our noise
    return vec4(rainbowColor * n, 1.0);
}
Here is the fully commented code, breaking down exactly what each section of the shader is doing. I have formatted it under a new heading so you can drop it directly at the bottom of your Chapter 14 documentation page.
Complete Example: The Dunes Shader
Below is a complete, real-world example of a MadMapper Material. This shader creates a flowing, wavy dune pattern. We have heavily commented the code so you can see exactly how the JSON header, custom math functions, and the main materialColorForPixel function work together to create the final visual.
OpenGL Shading Language
/*{
    "CREDIT": "Mad Team",
    "DESCRIPTION": "Dunes.",
    "VSN": "1.0",
    "TAGS": "graphic",

    // ---------------------------------------------------------
    // 1. INPUTS: These create the UI controls in MadMapper
    // ---------------------------------------------------------
    "INPUTS": [
        // Creates a slider for zooming in/out
        { "LABEL": "Scale", "NAME": "scale", "TYPE": "float", "DEFAULT": 1.0, "MIN": 0.0, "MAX": 4.0 },

        // Creates a slider for animation speed
        { "LABEL": "Speed", "NAME": "speed", "TYPE": "float", "MIN" : 0.0, "MAX" : 4.0, "DEFAULT": 1.0 },

        // Creates a push-button to reverse the animation direction
        { "LABEL": "Reverse", "NAME": "reverse", "TYPE": "bool", "DEFAULT": false, "FLAGS": "button" },

        // Creates a color picker for the dune lines
        { "LABEL": "Color/Front Color", "NAME": "foregroundColor", "TYPE": "color", "DEFAULT": [ 1.0, 1.0, 1.0, 1.0 ] },

        // Creates sliders for brightness and contrast
        { "LABEL": "Color/Brightness", "NAME": "brightness", "TYPE": "float", "MIN": -1.0, "MAX": 1.0, "DEFAULT": 0 },
        { "LABEL": "Color/Contrast", "NAME": "contrast", "TYPE": "float", "MIN": 1.0, "MAX": 3.0, "DEFAULT": 1 },
    ],

    // ---------------------------------------------------------
    // 2. GENERATORS: Smoothly handling time and speed
    // ---------------------------------------------------------
    "GENERATORS": [
        // This generates a variable called 'animation_time'.
        // It uses the 'speed' and 'reverse' inputs to calculate a smooth time value,
        // preventing the animation from jumping when the user drags the speed slider.
        // It also links this animation directly to MadMapper's global BPM.
        { "NAME": "animation_time", "TYPE": "time_base", "PARAMS": {"speed": "speed", "reverse": "reverse", "speed_curve": 3, "link_speed_to_global_bpm":true} }
    ]
}*/

// ---------------------------------------------------------
// 3. MATH & NOISE FUNCTIONS
// Because shaders calculate everything mathematically per-pixel,
// we use procedural formulas to generate random numbers and noise.
// ---------------------------------------------------------

// A hashing function that takes a 2D coordinate and returns a pseudo-random 2D vector.
vec2 hash( vec2 p ) {
  p = vec2(dot(p,vec2(127.1,311.7)),
           dot(p,vec2(269.5,183.3)));
  return -1. + 2.*fract(sin(p+20.)*53758.5453123);
}

// A 2D noise function based on the hash above.
// It smooths out the random numbers to create organic, cloud-like values.
float dunes_noise( in vec2 x ) {
  vec2 p = floor(x);
  vec2 f = fract(x);
  f = f*f*(3.0-2.0*f);
  vec2 uv = (p+vec2(37.0,17.0)) + f;
  vec2 rg = hash( uv/256.0 ).yx;
  return 0.5*mix( rg.x, rg.y, 0.5 );
}

// A simple wrapper function to easily get a random float using two integers
float rnd(int i, int j) {
  return dunes_noise(vec2(i, j));
}

// ---------------------------------------------------------
// 4. THE PATTERN GENERATOR (Gabor Noise)
// ---------------------------------------------------------
#define GABOR_BLOBS_NB 10       // How many overlapping waves to create
#define GABOR_BLOBS_SIZE 0.25   // The size of each wave

// This function creates the actual "Dune" look by layering multiple sine waves
// (blobs) moving in slightly different random directions.
float DuneStripes (vec2 uv, float d, float freq, float time) {
  float hv = 0.;

  // Loop through and create 10 different blobs
  for (int i=0; i<GABOR_BLOBS_NB; i++) {
    // Give each blob a random position and direction
    vec2 pos = vec2(rnd(i,0), rnd(i,1));
    vec2 dir = (.15+d)*vec2(rnd(i,2),rnd(i,3)) - d;

    // Add this blob's mathematical wave to our total height value (hv)
    hv += GABOR_BLOBS_SIZE * sin(dot(uv-pos, freq*dir) * 6. + time);
  }

  // Return the final combined wave pattern
  return hv;
}

// ---------------------------------------------------------
// 5. THE MAIN FUNCTION
// This is executed for every single pixel on the surface.
// ---------------------------------------------------------
vec4 materialColorForPixel(vec2 texCoord) {

  // Step A: Coordinate Setup
  // Center the coordinates around 0.5, apply the user's Scale slider,
  // and then shift them back. This zooms the pattern in and out from the center.
  vec2 uv = vec2(0.5,0.5) + (texCoord-vec2(0.5,0.5)) * scale;

  // Step B: Generate the Pattern
  // Call our DuneStripes function using the scaled coordinates.
  // We pass in our perfectly smooth 'animation_time' generator to make it move!
  float h = DuneStripes(uv, -.5, 10.0, -3.5 * animation_time);

  // Step C: Apply Color
  // Multiply the user's chosen Foreground Color by our dune pattern (h).
  // clamp() ensures the brightness values don't drop below 0.0 or exceed 1.0.
  vec3 color = foregroundColor.rgb * clamp(h, 0.0, 1.0);

  // Step D: Apply Contrast
  // mix() blends between a flat gray (vec3(0.5)) and our current color based on the Contrast slider.
  color = mix(vec3(0.5), color, contrast);

  // Step E: Apply Brightness
  // Simply add or subtract the brightness slider value from the final color.
  color += vec3(brightness);

  // Step F: Output the Pixel
  // Return the final calculated color, with an Alpha (transparency) of 1.0 (fully opaque).
  return vec4(color, 1.0);
}