MiniMad User Guide
(This is an abbreviated online example of the official MiniMad User Guide. For a more comprehensive overview download the official guide from here)
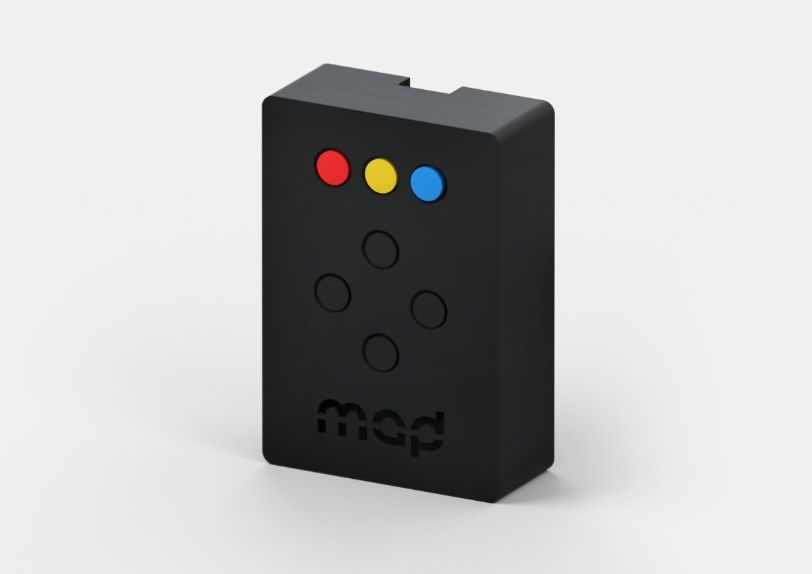
The MiniMad is an all-in-one dedicated media playback device for video and LED mapping, based on the Raspberry Pi platform. Easy to use, small, and versatile, it can be a reliable replacement for a computer in audiovisual installations.
MiniMad works with an SD-card that contains both the system and the software. It can either be installed with MiniMad Video to play video-mapping, or with MiniMad Light to play recorded DMX sequences.
The official MiniMad User Guide can be found online here or from the Help menu in the MadMapper Application
Note: MiniMad Video and MiniMad Light cannot be installed at the same time on the same SD-card.
Hardware & Power Management
Turning the MiniMad On
Turning the MiniMad on is as simple as plugging it in. To avoid physically plugging it in and out, you can use an AC power-switch.
Turning the MiniMad Off
Depending on the chosen export settings, you can either safely disconnect the MiniMad from power, or you may be required to shut it down properly to avoid data-corruption on the SD-card.
Data-corruption can happen if power is cut while the MiniMad is writing to the SD-card. This occurs:
- When changing media (if the "start last played media" setting is checked).
- When changing master luminosity or audio volume.
- When changing the playback mode.
- When editing using the mapping or image control modes in MiniMad Video.
If you use any of these features, do not cut the power directly. Instead, perform a proper shutdown using the MiniMad buttons (Hold Red + Blue for 2.5 seconds), a USB keyboard (Q), the MiniMad Controller, or via OSC. The green LED will blink 6 successive times to indicate the device can be safely electrically powered-off.
SD-Card Management
Activating Your SD-Card:
If you flash your MiniMad SD-card or use an SD-card from another MiniMad unit, you must activate it. Insert the card, connect an HDMI display, plug in the power, and follow the on-screen procedure. The red LED will blink rapidly when activation is required and stop once activated.
Flashing Your SD-Card:
Flashing is necessary if a newer system version is available, you are using a brand new SD-card, or the system suffers data corruption. Download the latest MiniMad system image from the MadMapper Downloads page and use the Etcher tool to flash the SD-card.
MiniMad VIDEO
Features
- Surfaces: Supports Quad, Triangle, Circle, and Mask surfaces. (Lines, 3D surfaces, and FX are not currently supported).
- Media: Supports a single media at a time across all surfaces. Movie files are transcoded during export to maximize smoothness. The maximum file size is 4GB (FAT32 limit) for a 16GB SD-card.
- Projector: Supports a single projector via HDMI up to 1080p (1920x1080).
Exporting to MiniMad Video
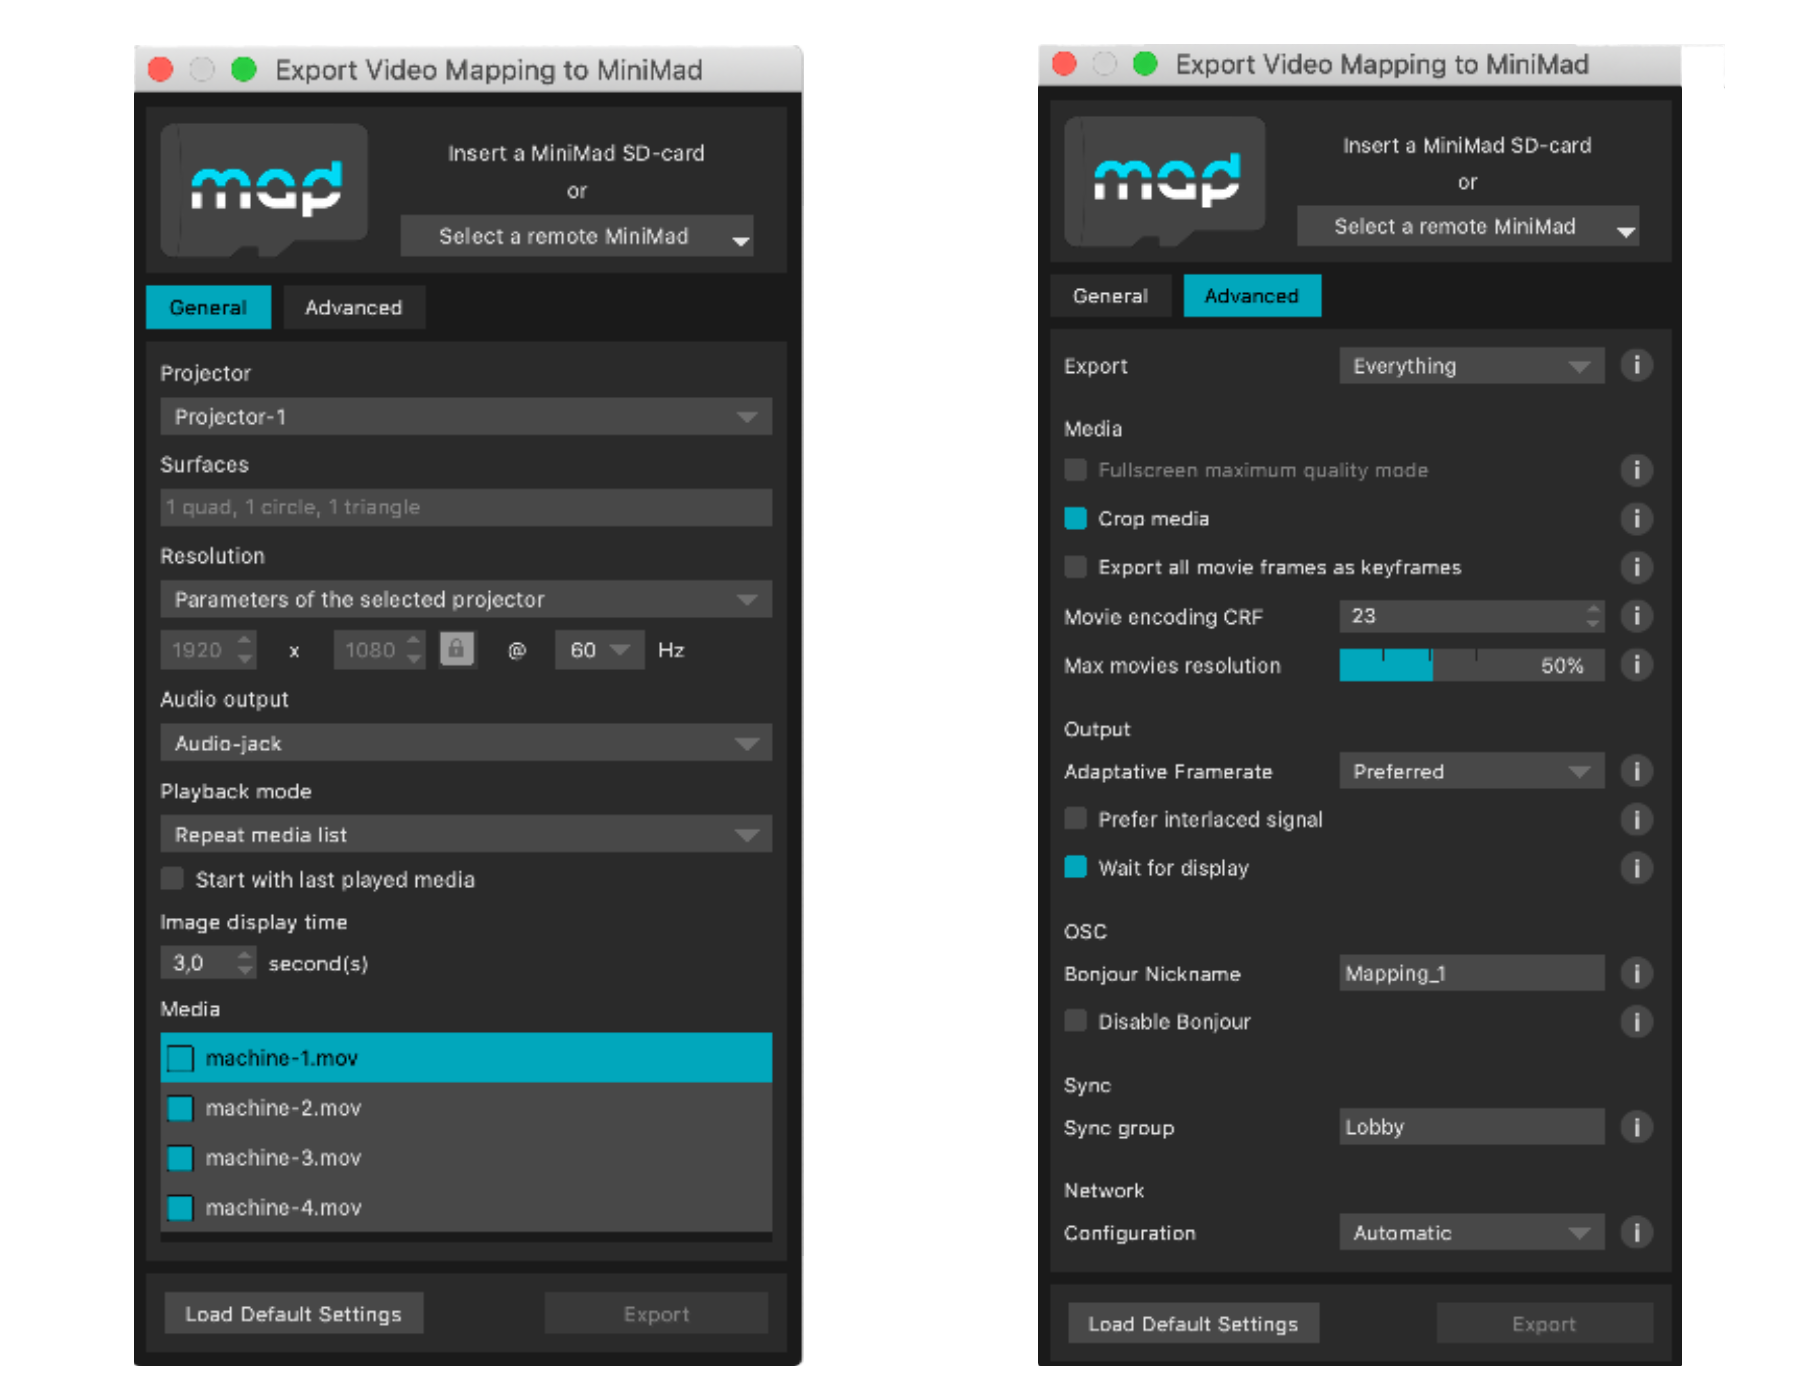
In MadMapper, click File > Export Video Mapping to MiniMad. (FFmpeg Tools installer is required). You can either insert the SD-card directly into your computer or export over the network to a remote MiniMad.
For simple setups (like a single fullscreen quad with no color correction), MadMapper will offer to switch on Fullscreen maximum quality mode to output up to 1080p30. Note: Mapping and color correction controls are disabled on the MiniMad when this mode is active.
Network Synchronisation
Connect multiple MiniMad units to the same ethernet network (via a switch) to synchronize media playback automatically. Movie synchronization happens across units playing a movie with the exact same frame count and framerate. Any media-related action (pause, restart, mode change) made on one MiniMad happens instantly across all connected units.
MiniMad LIGHT
Recording & Exporting
In MadMapper, once your DMX fixtures are set up, open Tools > MadLight Recorder. Click "Start Recording" to capture your DMX output, and optionally select an audio track. You can edit the in/out frames in the sequence list.
Click Export to MiniMad. By default, MiniMad uses the same DMX interface as MadMapper, but you can select a different one. For ArtNet, sACN, or OSC control, you can choose Automatic (DHCP) or Manual network configuration.
Audio Output
MiniMad can play audio through its mini-jack connector or via an external USB system-compliant audio device. Make sure to plug in the USB audio device before powering the MiniMad on. If the audio device draws too much power, use an externally-powered USB hub.
Controls (Video & Light)
OSC & MiniMad Controller
The MiniMad listens to OSC commands on port 1111 and declares itself via Bonjour. In MadMapper, you can create a new MiniMad Controller module to get full control of the device, mapping parameters to Keyboard, MIDI, OSC, BPM, or Cues.
Hardware Buttons (Media / Light Mode)
- Red + Blue: Hold to shutdown.
- Up: Change playback mode.
- Down: Pause media / Long press to restart.
- Left / Right: Previous / Next media (or sequence).
- Yellow + Up/Down: Control Luminosity (MiniMad Light).
- Yellow + Red: Toggle Blackout (MiniMad Light).
Keyboard Controls
You can attach any USB keyboard as a remote control. Key shortcuts include:
- Q: Shutdown
- Space: Pause / Play
- Numbers (0-9): Direct access to the first 10 media/sequences.
- Arrow Keys: Navigate media, adjust luminosity, or move control points (in mapping mode).
Troubleshooting & Tips
LED Status Guide
- Red (Solid): Powered and running normally.
- Red (Blinking Rapidly): SD-Card requires activation.
- Red (Blinking Slowly/Randomly): The device is not getting enough power. Ensure you are using the official 2A power supply.
- Green (Blinking): SD-card is being accessed.
Tips and Tricks
- Industrial Grade SD-Cards: For permanent installations or hot environments, we highly advise upgrading to Industrial/Military grade SD-cards to prevent data corruption.
- Exporting Generators/Materials: MiniMad Video cannot natively render MadMapper Materials or Generators. To use them, record your output using Syphon/Spout, and export the resulting video file to the MiniMad.
- Saving Modifications: No action is required to save. MiniMad automatically saves all mapping modifications when you exit the mapping mode (Red button).
- Rebooting: You can quickly reboot the MiniMad by holding all three colored buttons (Red, Yellow, Blue) at the same time.
Technical Specifications
- Based on Raspberry Pi 2 Model B
- 7 buttons control panel
- HDMI output up to 1080p60 (1920x1080 at 60Hz)
- 16 GB MicroSD-card included
- 2 Amps power supply (5V dc)