Soft-Edge Blending
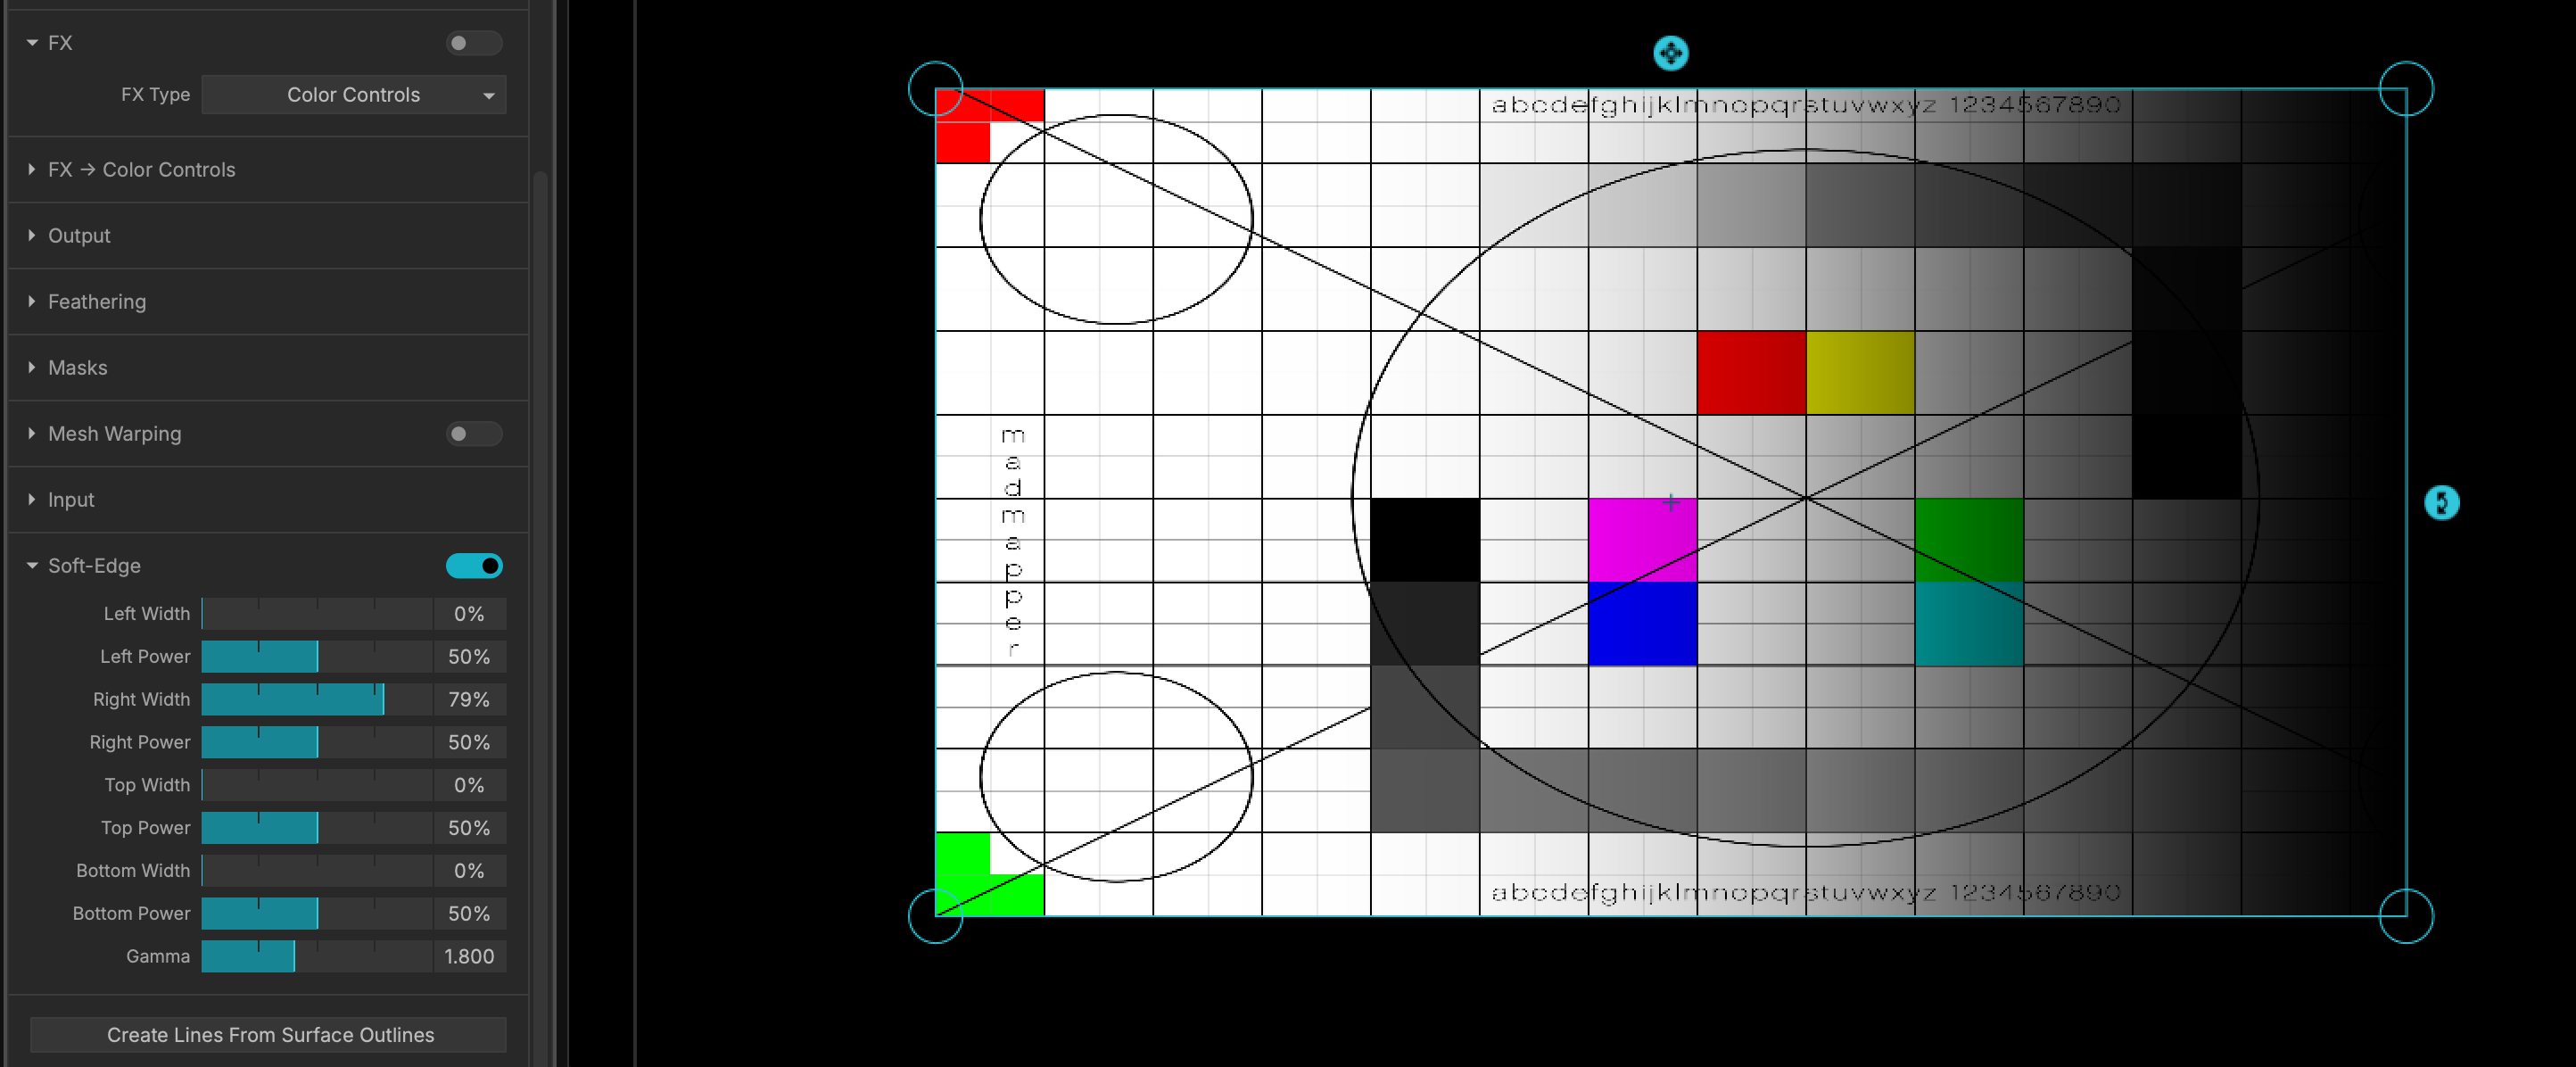
When you need to cover a massive physical canvas, a single projector is rarely enough. Soft-edge blending allows you to overlap the output of multiple projectors and smoothly fade their intersecting edges, creating a single, massive, seamless image.
Understanding Projector Overlap
- The "Sweet Spot": For standard edge blending in MadMapper, aim for an overlap of approximately 10% to 20%. If you are using MadMapper's official calibration card, this visually translates to overlapping about four grid boxes in the center.
- Why Overlap Matters: Without a soft edge, the intersecting area of two projectors is twice as bright (creating a harsh "hot spot"). MadMapper uses this shared physical space to calculate a smooth gradient fade, dimming each projector's edge proportionally so the transition is invisible.
- Balancing Canvas Size vs. Tolerance: A larger overlap gives you more visual tolerance if a projector vibrates or gets slightly bumped during a live event. However, keep in mind that every pixel in the overlap zone is "double-duty" data—meaning the more your projectors overlap, the smaller your total physical canvas width becomes.
- Projector Stacking (100% Overlap): If your goal is not to create a wider image, but rather a brighter image, you can overlap the projectors 100%. MadMapper easily handles stacking by simply duplicating the output mapping across both projectors to double the luminance.
Best Practices & Setup Tips
- Match Your Hardware: Using the exact same projector model with a similar bulb life is highly recommended. Mixing models or bulb ages will cause issues with inaccurate colors, mismatched resolutions, and uneven lamp brightness that cannot be easily fixed in software.
- Physical Alignment First: Before attempting software edge blending, try to physically align your projectors and mechanically adjust their keystone and lens shift as perfectly as possible to make the software process much easier.
- Lens Considerations: Standard lenses are best for edge blending. Short Throw and Ultra-Short Throw (UST) lenses can be much more difficult to blend because of how drastically the extreme edges of the lens warp the image projection.
Standard Technique: Built-In Soft Edge
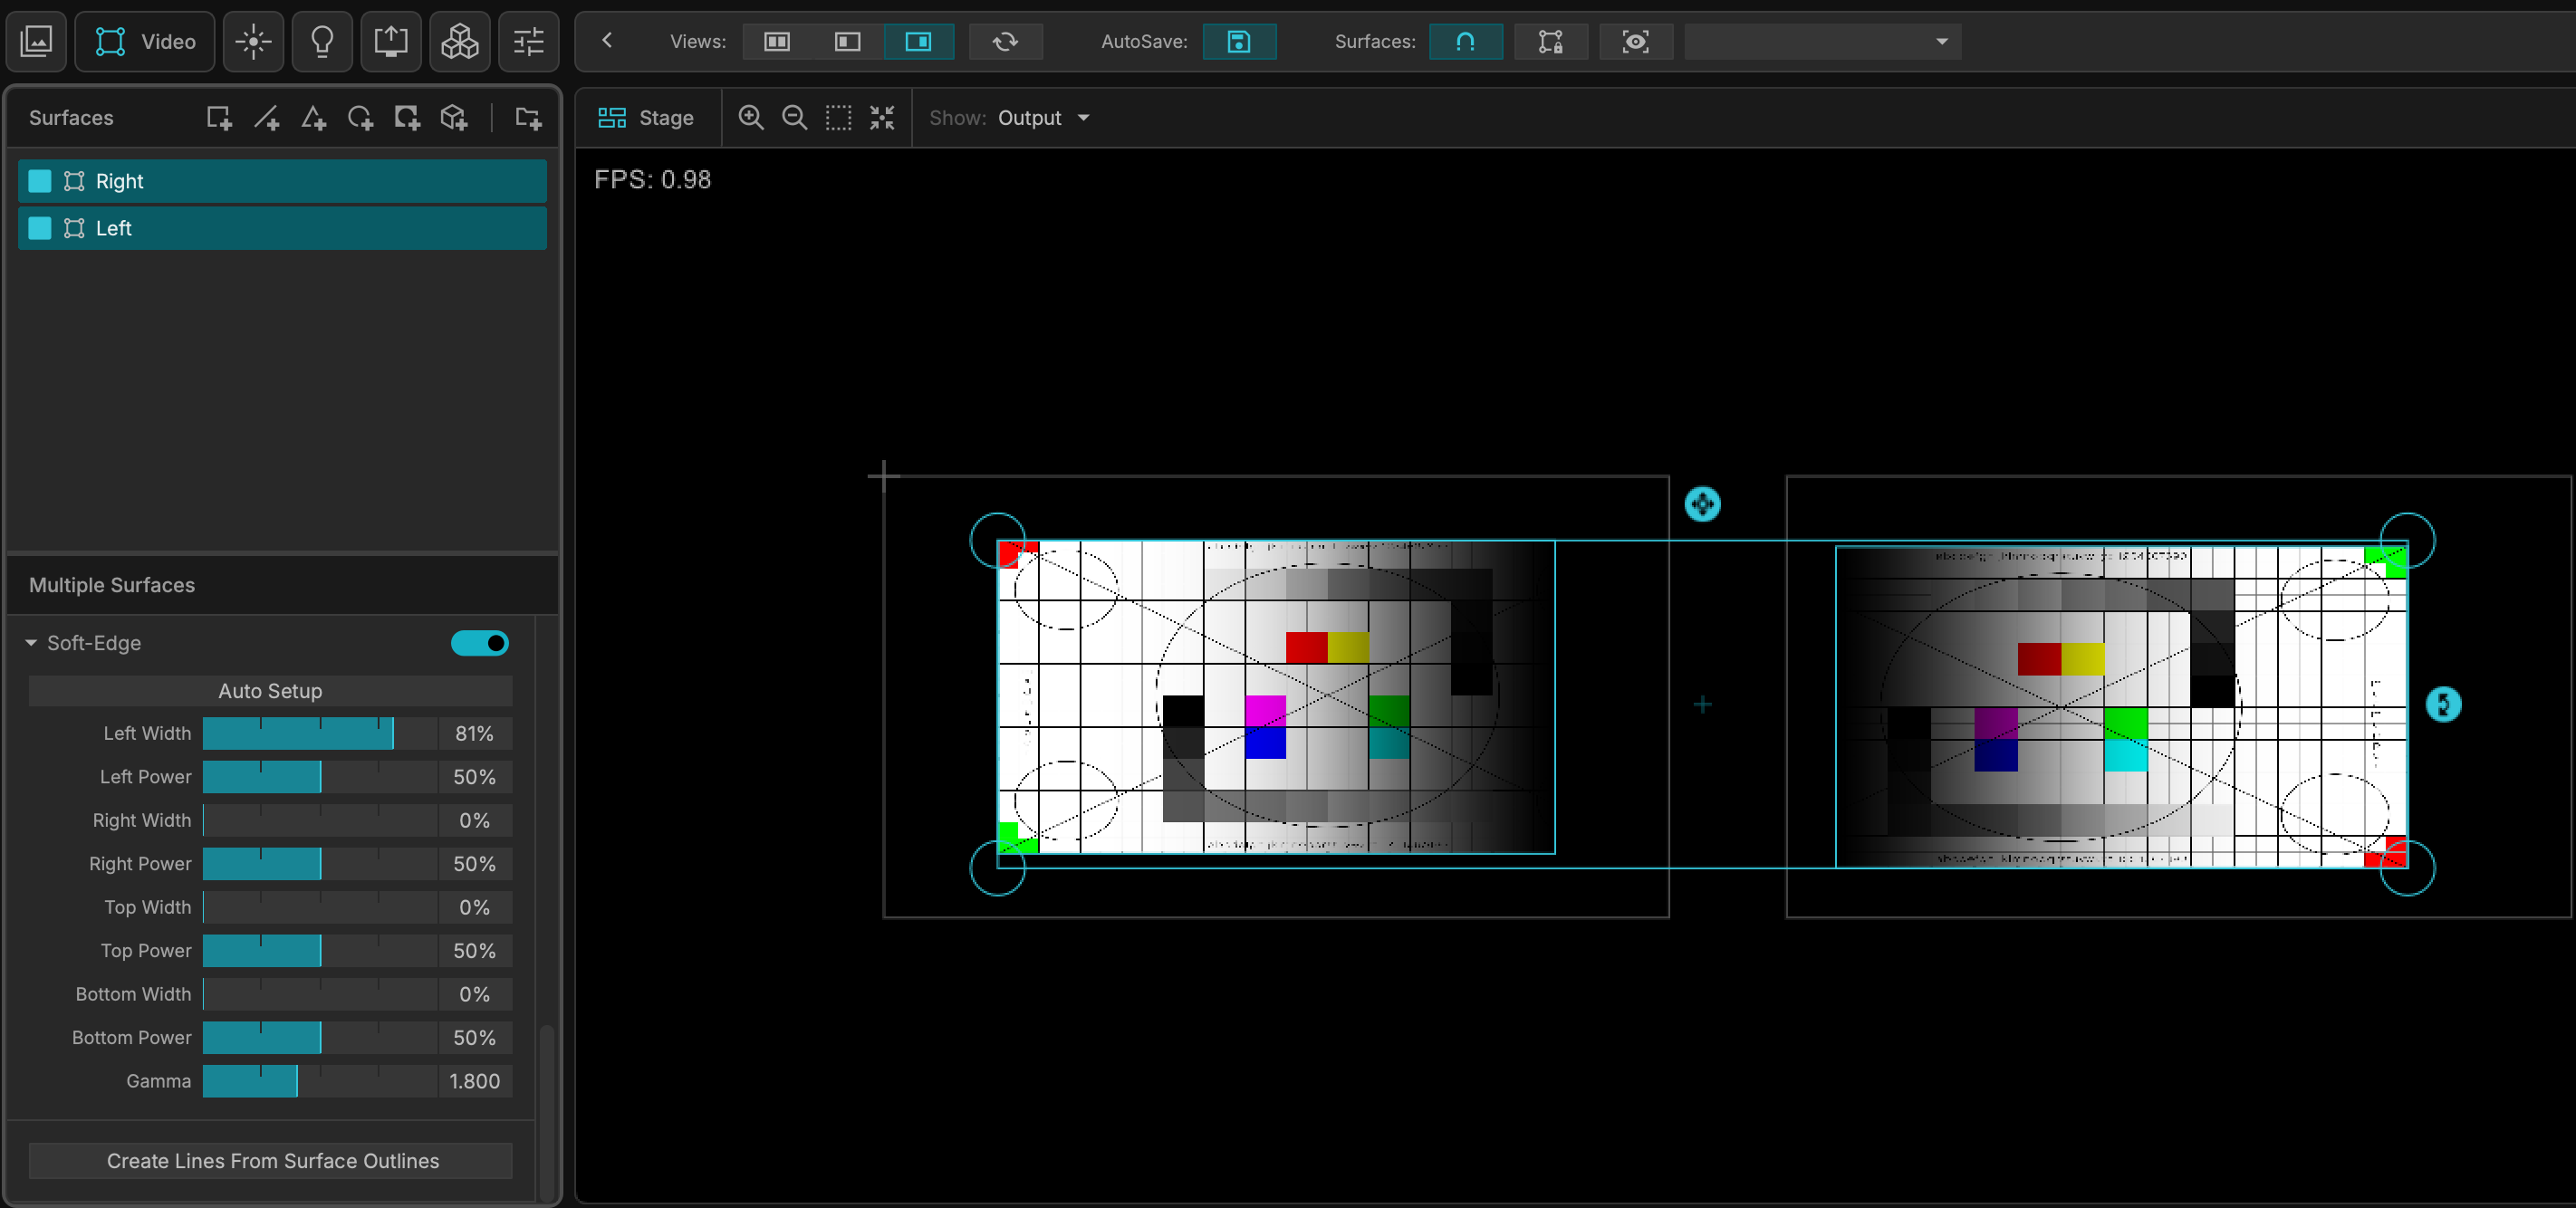
The standard blending method uses MadMapper's automated soft-edge tools to feather the top, bottom, left, or right edges of your video quads.
- Output Setup: In the Projectors tab, ensure both projectors are enabled, set to fullscreen mode, and visually check their position by temporarily activating their built-in test patterns.
- Calibration Media: Add a calibration card to your Media Bin (these can be downloaded from the MadMapper website). Assign this media to a Quad and duplicate the Quad for your second projector.
- Physical Overlap: In the stage view, arrange your Quads so they overlap to form a larger rectangle. The physical projection should overlap by approximately 10% to 20% (or roughly four boxes if using a standard grid calibration card).
- Geometric Alignment: Adjust the four corner handles of each Quad in the output view so the overlapping grid boxes perfectly match and align in the real world.
- Auto Setup: Select both Quads in your Surfaces list at the same time. In the Surface Inspector, check the Soft Edge box and click the Auto Setup button. MadMapper will automatically calculate the intersecting areas and apply a gradient fade. (Note: For the "Auto Setup" calibration to work, you must select multiple surfaces simultaneously).
- Fine Tuning: Select each Quad individually and expand the Soft Edge parameters. You can manually adjust the Width and Power (gamma curve) of the blend on the overlapping side (e.g., adjust the right edge of the left projector, and the left edge of the right projector) until the seam disappears.
Advanced Technique: Blending with Surface Masks
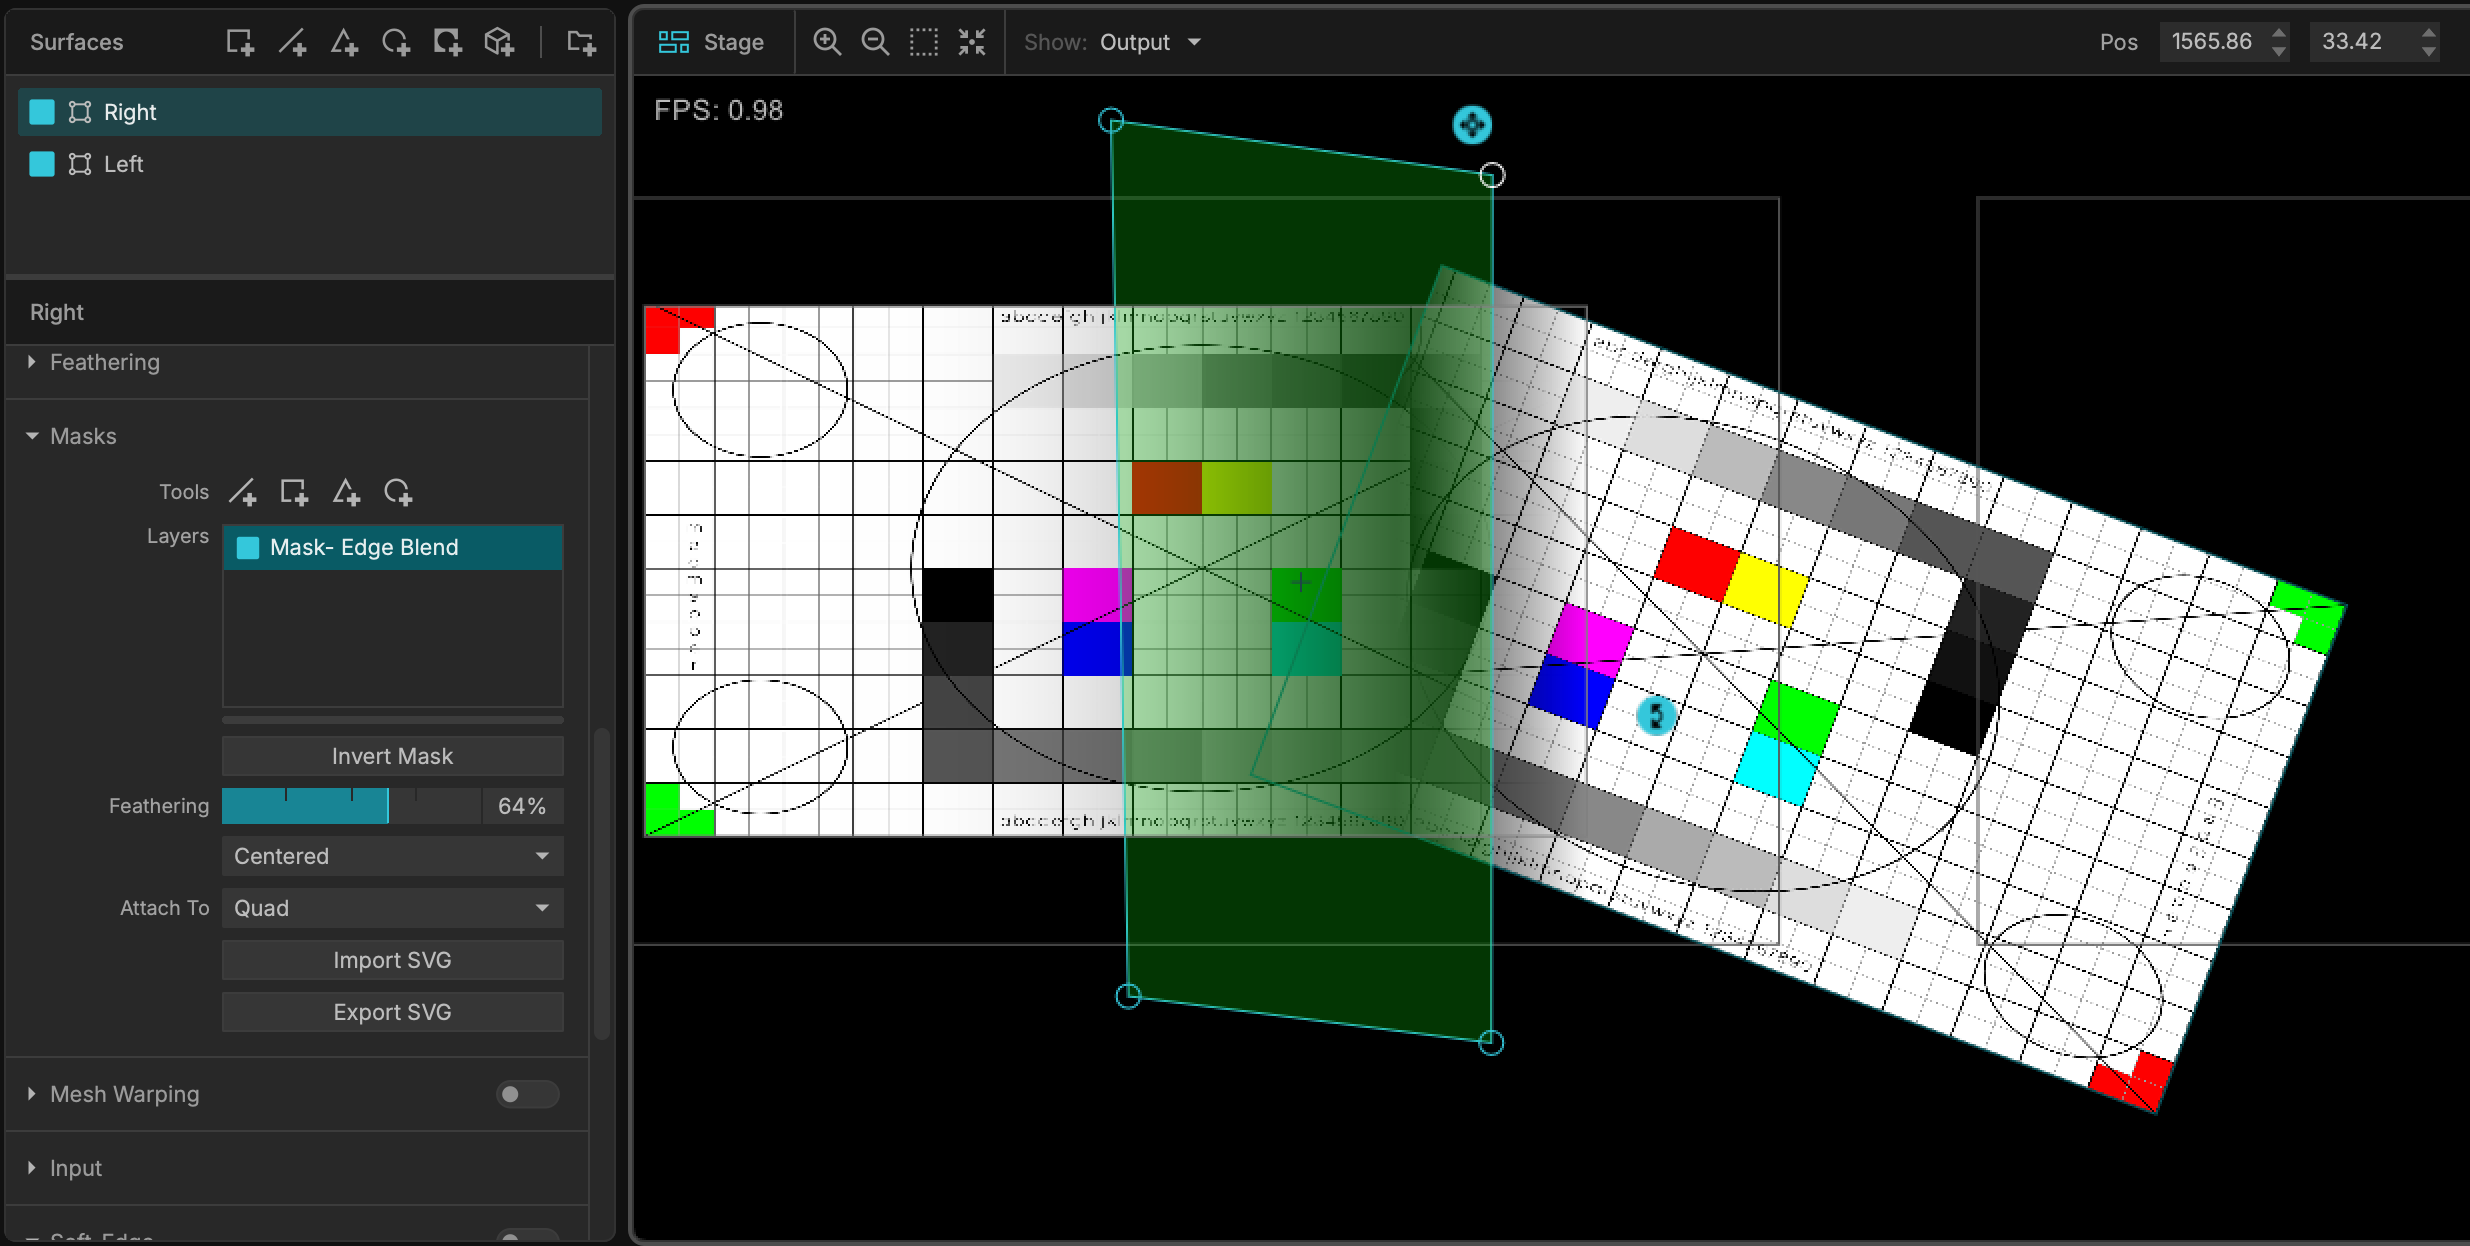
The built-in Soft Edge tool only works on straight, perpendicular edges (top, left, bottom, and right). However, in complex projection mapping scenarios, your projectors may be overlapping at odd angles or projecting onto non-flat architecture where simple edge blending won't do.
For overlapping edges that are not parallel or perpendicular, you can create custom soft edges using Internal Masks:
- Select the Quad or Surface you need to blend.
- In the Surface Inspector, add a new Mask (or use the Mask tool to draw a shape over the specific area where the projectors overlap).
- Shape the internal mask to perfectly follow the contour of the intersecting projector light.
- Adjust the Feathering parameter on the mask. This will create a custom, variable gradient fade along the drawn line of the mask.
- Repeat this process for the intersecting surface on the second projector, and adjust both feathering values to achieve a smooth, custom edge blend.